Wednesday 30 November 2011

Roll Playing

Piccoli Involtini di Manzo Ripieni di Pepe, con Sansho, su di Orzo & Verdure alla Curcuma
Pepper-Filled Beef Rolls with Sansho on Turmeric Barley & Vegetables


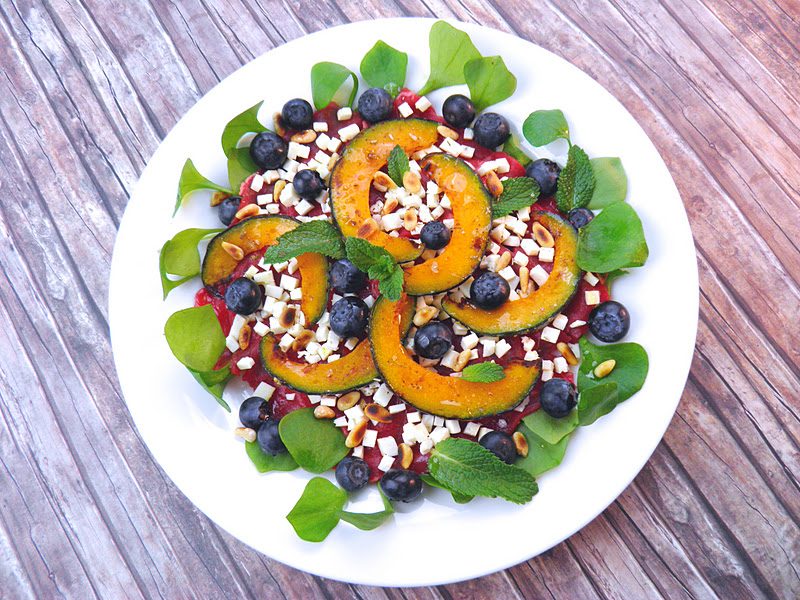
As you can see from the photos, I was in a rather playful mood as soon as I got into the kitchen this evening- which would also suggest to you, if you knew me a little better, that my day had been a tough one. As are most of my days of late. As have been most of them this whole year- which is partly the reason that I am keeping this blog! It is my way of retaliating with something creative and colorful and fun. It's my way of saying "bring it on!" And of course it is my way of practicing and preparing for some time when I will have more opportunity and more expertise to produce more and better recipes for you all to enjoy!

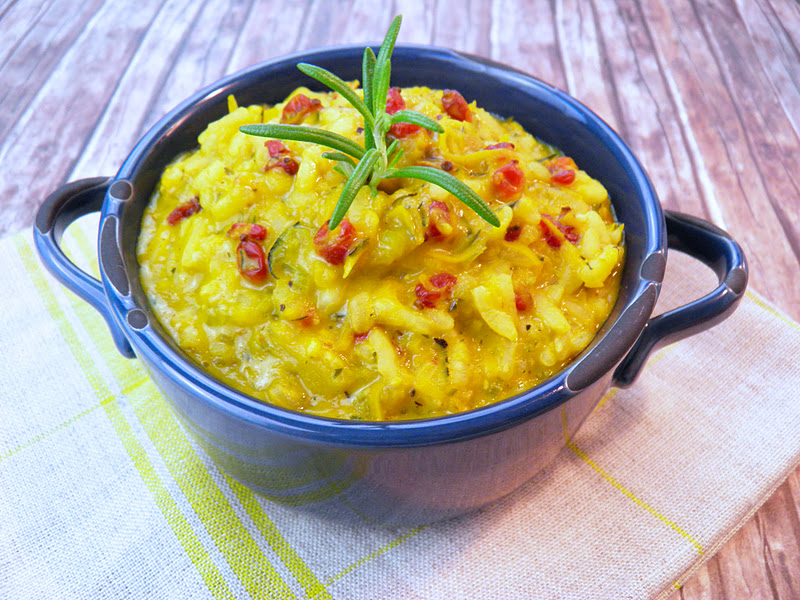
The barley for this dish was mixed with carrots, celery and onion, a little diced pepper and flavored with turmeric, ginger and lime. I sautéed the above ingredients in a little clarified butter and then deglazed the saucepan with a splash of white wine and some boiling water- just enough to cover the surface. I reduced the heat to a slow simmer and stirred only occasionally- and whilst the barley finished cooking I put together the meat rolls...


The meat I used was a very thinly sliced scallopini cut, which I cut into strips of approximately 2" x 4". I seasoned them with salt and pepper, spread them with a very little cheese curd (but you can use any cream cheese you prefer), grated them with ginger, and laid 3 slices of slightly pre-cooked red bell pepper onto each strip of beef before rolling them up. This helps to keep the beef a little more juicy and succulent, as well as adding a nice texture and flavor. I had briefly sautéed the peppers for 2-3 minutes in advance, to give them a bit of a head-start inside the rolls. I tied them with garn and then flash-fried them in a little clarified butter for 1-2 minutes on either side. I didn't use a skewer or toothpick, as you can not get them browned off nicely all the way around that way. 


As soon as they were nice and brown, I removed the thread, added some white wine to deglaze the pan and a little water so that they could steam a little and popped on the lid. When the liquid was almost gone, I added a drizzle of honey, a little 5-spice powder, a good squeeze of lime juice and made sure that the rolls got a nice glaze all over. I let them cook and glaze for a further 2-3 minutes and prepared the barley on a nice dish in the meantime. I set the rolls on top and sprinkled them lightly with a little sansho pepper, just to give my taste buds a little kick! But remember- be careful with that stuff!

What a nice, easy and delicious little meal it was! Hope you decide to try this combination too- and hope you enjoy it as much as I did if you do!

Tuesday 29 November 2011

Savory Supper Muffins!

"Muffin" di Broccoli, Salsiccia Secca & Ricotta Fresca
Broccoli, Cream Cheese and Spicy Sausage Muffins


This is another one of those "file under easy" dishes from me- and wouldn't you know it- a muffin, from the man who doesn't know how to bake! I had the last leftover of broccoli that I wanted to use up and the last of my eggs- and they were both practically begging to be turned into muffins! I know how weird that sounds- but it's true!

Sure, I could have made a frittata or some kind of quiche, but I was in a hurry as usual and I knew that this would be the quickest solution!


I had a last chunk of spicy sausage, which I chopped finely and began to fry in a dry non-stick pan. I then added the broccoli, which I had broken up into little "florets" and a cupful of water, so that they would cook more quickly. I let them steam together for 2-3 minutes and then drained them and rinsed them under cold water in order to stop the cooking process.

In a bowl, I cracked and beat 4 eggs together with 2 tablespoons of cream cheese or cheese curds. I added a finely chopped spring onion, the broccoli and sausage, some nutmeg, salt and pepper. I decided they should have a little bit more "oomph!" and added around a tablespoonful of smoked paprika powder. I added a couple of tablespoons of flour and a tablespoon of baking powder and mixed everything together well.


I then filled the mix into a lightly-greased muffin tray and baked as a moderate heat for 15 minutes with a further 5 minutes under the broiler to get them nice and brown. Easy! The fluffed up wonderfully and were a real treat- mild and tasty broccoli with spicy and savory sausage in a fluffy, eggy and mildly cheesy little flavor explosion- I know you are going to love these! And so much fun!

Monday 28 November 2011

Oven-Ready Comfort

Maccheroni al Forno con Broccoli, Salsiccia Secca, Pomodorini & Feta
Oven-Baked Macaroni with Broccoli, Dried Italian Sausage, Cherry Tomatoes and Feta Cheese


It was a cold, dark, foggy and miserable walk home after a hard day at work again today. And we all know what that means- you got it... comfort food! Something to take your mind off your stress and worries, to warm you up and to make you feel good even though it is freezing cold outside. And preferably, if I have anything to do with it at least, something that does all of the above FAST! Something like this...

Ok people- picture this: I am starving and desperate for that dish of crispy-topped and yummy pasta you can see in the photos. I walk into the kitchen and am in a kind of "chef's auto-pilot mode". I turn on the oven first. Then I remember to take out all of the clutter I have inside. I try to calm down and think straight- I am SO hungry! I put on a saucepan of water for the pasta and at the same time, a frying pan for the rest. I snap the macaroni in half- remembering that if I don't, they will be impossible to eat and being thankful that I am going to be eating alone, as these things otherwise swing out from your fork when you try to eat them and either whiplash you in the face, or spray your partner or table guests with sauce. Or both.

As soon as the water boils, I add ample salt and pop in the pasta, stir it and get busy with the other ingredients. I used some cured Italian sausage, which is a milder, softer version of a salami I guess- perfect for this kind of dish. But you know me- I hate to eat food that has too much fat in it- and as this sausage seemed a little fatty, I dropped it into the noodle water in a colander for 2-3 minutes and then fished it out and popped it into the frying pan. The boiling water dissolves away a lot of the fat, but at the same time, the pasta takes on some good flavor- and afterwards, you will pour that excess fat away. Good idea, huh?


As soon as you have fished the sausage out, pop the broccoli in. In the meantime, the sausage is sizzling away in your dry frying pan, and you can add some chopped garlic and spring onions. As soon as they begin to brown a little, deglaze your pan with some milk, grate it with nutmeg, season with salt, pepper, chili and turn the heat down to a slow simmer.

Once the pasta is done, strain it, give it a little shake and then transfer it to the frying pan with the sausage and savory milk mix. You know me well enough be now to know that I will avoid cream if I don't think it is absolutely necessary- and trust me- this is another case where it will taste just fine without. Bring it back to a gentle boil and let it continue to cook together for a minute or two before transferring it to an oven-proof dish. Add a couple of cherry tomatoes and a sprinkle of diced Feta cheese, grind freshly with pepper and nutmeg and add a little salt for the tomatoes. Ready!

You should have managed to do that all in 10 minutes... I did! If you are fast, it will all still be hot, so if your oven was pre-heated, you basically only need another 10 minutes or so for it to come up to temperature, to brown off on top and for the Feta to melt. In those 10 minutes you can set that table, light those candles and pour that wine... and get ready to relax and enjoy! You deserve it!

Sunday 27 November 2011

La Cosa Nostra

Risotto Siciliano con Osso Buco di Vitello
Sicilian Risotto with Veal Osso Buco


Yes indeed- "cosa nostra", which means "our thing", really is the right name for this dish.
Because it IS our thing- risotto, the way we make it back home in Sicily. None of this sautéeing in butter of rice and onions, no deglazing with white wine- no, no- this is the ultimate in Italian comfort food, let me tell you! And this is the way we make it!

One of the main differences between this risotto and most others, is that we do not start by frying onion and adding the rice till it becomes translucent and then adding wine and broth, but we start off with a tomato sauce which we bring to the boil and then add the rice to that.
So I made a simple sauce, starting with a "sofritto" of celery, carrots and onions. After frying these together for 1-2 minutes, I added some tomato paste and garlic and fried it for another 2-3 minutes, before deglazing the saucepan with a tiny splash of red wine and some boiling water. I added a small handfull of dried basil, a little oregano, a bay leaf, salt, pepper and a hint of nutmeg, then reduced the temperature to a slow simmer whilst I prepared the veal.

I dropped the veal shank (osso buco), into boiling water, with a carrot, a stick of celery and half an onion- these would go to flavor the broth. I added salt, pepper and a bay leaf and let this simmer for an hour or so. After an hour in the water, I transferred the meat to the tomato sauce and let it simmer there for a further hour- that way I had flavorful broth and flavorful sauce. Traditionally, you would use left-over sauce, which would save a lot of time in the prep work!


Okay- so now that we have a tasty broth and a tasty sauce, we can begin to make a tasty risotto! Set the veal to one side and bring the sauce and the broth to the boil. Add your risotto rice, 1 cupful per person, to the boiling sauce and stir! At this point I added about a cupful of frozen peas. You can use fresh if you have them (and if they are sweet- usually they are just green bullets!)- but I think frozen are fine and definitely the easiest and best in this case. So now you can begin added the hot broth to the risotto, one ladleful at a time in the time honored manner. It's not difficult!

Around 5 minutes before the rice is done,and is "al onda" as they say- which means when you push it back with the back of your spoon, that is gently flows back like a wave, or "onda", add some grated parmesan cheese- or as I did, salted, grated ricotta. Give it a good stir, put on the lid, turn off the heat and let it sit for 2-3 minutes. Finished!

Serve with a fresh basil leaf or two, a little pepperoncino- and get ready to taste MY ultimate comfort food! Forget your lasagne or macaroni cheese or whatever... this is the real, Sicilian Deal!

Rockin' Rolls!

Dolci al Pistacchio, Zucca, Cocco e Uvetta
Pistachio, Pumpkin, Coconut and Raisin Pinwheels 


Here's another one of my "pastries for people who can't bake" ideas for you. Oh, I'm sorry- I didn't mean to insult you and suggest that you don't know how to bake... it's ME that doesn't know how to bake! And so occasionally I come up with this kind of little sweet-treat, using pre-made puff pastry - which of course you would be crazy to go to all the trouble of making when someone else can do much better for us...

So how did I make them? Easy! I had the last hunk of leftover Hokkaido pumpkin left over, which I grated finely. You can use and kind of pumpkin- this is just what I happened to have at home today. To the grated pumpkin I added dried coconut flakes, raisins and chopped pistachios. I added a little maple syrup, a little grated ginger, a good sprinkle of cinnamon and a tiny hint of nutmeg. The amount of each ingredient is up to you and is purely a matter of taste.


Mix all of the ingredients together well using a fork or a whisk- the consistency should be slightly moist, but not too dense- it should still easily crumble apart. I didn't add any extra butter or fat- I think there is enough in the puff-pastry for my taste. Also, a little bit of Maple syrup goes a long way and the raisins are already sweet in themselves. So much to the ingredients!

Spread the filling out onto the pastry and make sure the raisins are distributed evenly- it would be a shame if they all clumped together in one place. Now roll the pastry together tightly and begin to cut slices from it of about 1" in size. Lay these on their sides and give them a little squeeze down flat to keep them in shape. Bake in a pre heated oven at a high heat for 10-15 minutes until the pastry puffs up and becomes golden brown- that's all there is to it! And in the meantime, you can brew yourselves a pot of coffee and get ready to enjoy some yummy hot pastries!

Saturday 26 November 2011

Chips that can't be Beet?

"Patatini" di Barbabietola Multi-Colorata
Multicolored Beetroot Chips


Are those the craziest looking chips that you ever have seen- or what?? And they are neither deep-fried, nor are they made of potatoes... Nope, these tasty, oven-roasted chips are made of beetroot- and probably the strangest and most wonderful looking beet roots I have ever come across!

Whilst checking out the produce at the Frankfurt Kleinmarkthalle today, I noticed one of these wonderful stripy vegetables and just had to know what it was. The friendly and jovial vendor, Franz Olbrich, took great pleasure in explaining to me that it was indeed a rather uncommon variety of beetroot. He then disappeared to the back of his stall and returned with another beet, that he had cut in half. It too, from the outside, looked like a typical dark red beetroot. He handed it to me and told me to take a sniff with my eyes closed and tell him what it was. I said "beetroot of course" and then opened my eyes and was confronted by the dazzling yellow you see below. Could I resist buying a couple?!! Did it take long for me to think of some dish to make with them? of course NOT!


 I decided that I didn't want to "cook" them, as they have such a wonderful look to them, I didn't want to lose the intensity of the color or the simplicity of their nice sweet and earthy flavor. Thus the idea of the chips. That I am cautious with cooking with fat will explain the fact that I baked them in the oven, rather than deep frying them.

The one step I did take, was to VERY BRIEFLY "blanche" them before baking, for 20-30 seconds only and then dry them off. This helps to reduce their moisture content a little and will help to make crispier chips.


 I lightly oiled a baking tray with olive oil and lay out the slices in equal spaces and baked them for 2-3 minutes, until brown from either side. Yes it is easy- but you DO have to be there all of the time and to keep your eyes on them... or they WILL burn! I had to sacrifice a couple myself- but it is doable and you can get it to work just fine!

As a seasoning, I "invented" another of my flavored salts- this time made of coarse sea salt, fennel and cumin seeds, a little chili, a little sugar, a little citrus zest and a lot of elbow power as I ground it all up with my mortar and pestle! Ugh! But the result was pretty delicious and worked wonderfully with the beets!

I am not going to lie and tell you that they are as crispy as potato chips- but they are as delicious and they are colorful and easy to make... and I may well make them again!

Thanks again Franz Olbrich!

Broccocino

Zuppa di Broccoli & Zenzero, con Crema di Latte, Patate + Sansho
Broccoli and Ginger Soup with Potato, Milk and Sansho Cream


Now that's a weird cup of coffee for ya! This was another of those very easy, very quick and very rewarding dishes... I hoe you will try it yourselves some time!

I started out this tasty little soup, with a chunk of broccoli, which I trimmed down into smaller pieces. I wanted this soup to be a quick and easy one for a number of reasons- one of them being that I wanted it to look great and maintain the great color that broccoli has when it is raw. And by Jove I did!

I then sautéed in a small saucepan, onion, celery and carrot- my base for most soups and especially anything vegetable. I then added garlic and ginger, a little 5-spice powder and a little chili. I also boiled a couple of small-ish potatoes with the broccoli- but we will get around that soon enough...

After boiling gently for 5-6 minutes, you can already pour everything, including one of the potatoes, into a blender and give it a whizz! The potato will help to "stabilize" the soup and thicken it nicely.


For the cream topping, I boiled milk and added the other potato. mashed it down and frothed it up with a hand-held mixer with a hint of Sansho powder. When I say "a hint", I mean literally around a quarter of a teaspoon at the most! I added a little salt and pepper and that was all there was to it- Pretty simple I'd say!

Serve layered in a a "latte macchiato" type glass, with a drop of sesame oil to the milk and potato froth and a garnish of chili threads... who said you are not allowed to play with your food?

Friday 25 November 2011

Cuts and Grazes

"Kasseler" Glassata di Miele con Fagiolini Mungo, Puré di Patate e Cavolini di Bruxelles
Honey-Glazed Kasseler with Urid (Mungo) Beans, Mashed Potatoes and Brussels Sprouts


Yes indeed- I did cut and I did glaze this last piece of Kasseler this evening- and very tasty it ended up being too! I decided to cut a criss-cross pattern into it and then rub fennel and caraway seeds into the cuts, to infuse it with some good flavors before glazing it, which was a great way to add some more exciting taste into hearty cured pork.

But before I tell you about how I glazed the pork, let me say a few words about those lentils. Because that's what I thought they were... I thought I was buying some cut-priced Beluga lentils at the Indian store! But no- these wonderful little things are actually beans- an Indian variety known as Urid or Mungo Beans. I prepared them by soaking them for an hour in cold water and then boiling them and cooking them on a low simmer for another 45 minutes or so. I cooked them with a little celery leaf, bay leaf, salt, pepper and paprika and then towards the end, added the finely onion, parsley and the hint of lemon. They taste much nuttier and more satisfying than lentils in my own opinion- I shall be making them again for sure!

Next on the agenda is the meat I guess, as the mashed potato and Brussels sprouts were kept very traditional and straight-laced. The potatoes were classic butter, milk, nutmeg, salt and pepper- the sprouts got a little sea salt and butter. So yes- the meat!


I made sure that caraway seed, fennel seed, salt, pepper, garlic and a little cayenne got into all of the slits I cut into the Kasseler and then fried it on either side. Kasseler does not take much cooking, so after 4-6 minutes in all it was ready. I added a drizzle of honey, a splash of cognac and then flipped it over a couple of times, to be sure that the honey coats the pork nicely and that everything gets a nice, sweet and golden glaze! A little squeeze of lemon juice, was all it needed to make is a perfect balance of salty, sweet and savory... and that was it- quick, easy and different- three of my favorite things when it comes to food!

Hope you enjoy it as much as I did!

Wednesday 23 November 2011

What a Curry On!

Ananas & Carne di Maiale Curata "Kasseler" al Curry con Peperoni Rossi e Menta
Curried Pineapple, "Kasseler" Cured Pork, Red Peppers and Mint 


I guess thanks for this dish need to go out to my friends Martin and Georg, who kindly donated a HUGE pineapple yesterday, after we finished doing a photo-shoot for a new fruit juice design we are working on. So check this out guys- not the typical sweet'n'sour pork dish here- but easy, quick- and I would say a lot more tasty!

One combination I really like is pineapple and mint- though each is very strong-tasting in their own individual way, I find them wonderful together. I also love what happens to pineapple after it has cooked for a while and caramelized a little and begins to give off its rich, tangy juices... mmm!


So I started off with some diced "Kasseler"- which is a kind of cured pork here in Germany, similar to Gammon in the UK- alas I do not know an American equivalent. Let's just say it is like a mild, juicy bacon. The Kasseler went into the frying pan first and was followed by the pineapple as soon as the pork started to brown.


I seasoned it with a tablespoon of Madras curry powder, a little freshly ground Panch Puren spice, salt, pepper and a little grated ginger. Once the pineapple begins to give off its juice, add the red pepper, some finely chopped marjoram, parsley and mint. I kept the heat up relative high in order to get the sweet pineapple juice to start caramelizing- which gives everything a really wonderful flavor.

After 3-4 minutes, I added half of a red onion in fine slices and a squeeze of lime juice... and that is practically all there was to it! I served it on a bed of Jasmin rice, with a couple of fresh mint leaves as a garnish... and as you can see- it looked petty yummy! So I hope you all enjoy it!

Tuesday 22 November 2011

Thank You Berry Much!

Risotto alla Zucca ai Crespini
Barberry & Pumpkin Risotto


I couldn't help thinking, whilst making this risotto dish this evening, that if I had used cranberries rather than barberries, it would have made a wonderful alternative side dish for my American friends for the Thanksgiving holidays. Maybe next time- or maybe you will try it out with cranberries instead- I can't imagine there being much of a difference in the result to be honest... because both are going to be equally delicious!

There is no big back-story to this recipe... I just got home late from work, hadn't planned what I was going to make, checked what I had in the fridge, freaked-out and then decided to make the most of what I had... as usual! So there was still pumpkin- and though it CAN be a bit tedious, I also felt that it IS seasonal and it IS cool to do something a little out of the ordinary with it. Hope you like what I did as much as I enjoyed it!

I started off by sautéeing onions and celery in a little clarified butter. Once they had become translucent, I added the rice and stirred it in well. I added a half teaspoon of turmeric, some finely chopped rosemary and a little grated ginger and after a further minute or two, deglazed the saucepan with a dash of white wine. I then added some crushed garlic and began to add the broth, ladle by ladle, in the classic manner- you know how!


Whilst the rice was gently cooking, I grated around 2 cupfuls of pumpkin- I used Hokkaido again... and I still have half of it left! I am thinking the rest of it needs to be turned into another sweet dish maybe... we will see! In any case- in went the pumpkin and also a couple of handfuls of dried barberries- or cranberries if you prefer. Keep adding the broth and stirring, stirring, stirring!

After about 20 minutes, the rice should be almost done. At this point, in a traditional risotto, you would be adding grated Parmesan or Grana into it- but I decided to try using finely chopped feta instead. I added the cheese and a splash of milk, stirred it together well, added a splash of olive oil, put the lid on top and let it sit for the last 2-3 minutes. Finished!

The tangy barberries go really well with the turmeric and the pumpkin, the chicken broth gives the risotto a delicious richness and the feta gives it all a little more depth. I served it with a little garnish of rosemary and enjoyed a nice, chilled Chardonnay with mine- hopefully you will too!

Monday 21 November 2011

How to be a Pasta Master

Penne con Straccetti di Manzo, Zucca, Sedano, Maggiorana & Ricotta Salata
Penne with Beef Strips, Hokkaido Pumpkin, Celery, Marjoram and Salted Ricotta


Tonight was a night for using up bits and pieces that were left over from the weekend and I love doing that! It is like giving myself a licence to throw caution to the wind and just go a little bit more crazy than usual! Having said that, the ingredients that I needed to use up just went wonderfully together- and the result was simply a great plate of pasta!

I had 2-3 strips of the beef carpaccio left over from Saturday and a chunk of hokkaido pumpkin that I wanted to use up. Also, I still have more of the marjoram I bought. Not being accustomed to using fresh marjoram so often and thrilled as I was from the mashed potatoes from last night, I decided to use some for my pasta too. It was a very quick and easy meal to make and it went something like this...


I put the penne on to boil and at the same time pot the beef, which I cut into small strips, the celery and pumpkin in slices and some finely chopped garlic and onion, into a non-stick frying pan and tossed them together for 4-5 minutes. I seasoned them with salt, pepper, nutmeg and a good handful of freshly plucked marjoram leaves. I added a ladle of hot broth from the pasta to this mix and let it simmer gently and let all of the different flavors blend together.

In the meantime, after about 8 minutes, I drained the pasta and put it straight into the frying pan with the other ingredients. I added a sprinkle of ground chili or peperoncino, a tiny splash of olive oil and mixed everything together nicely. And that was it! You can't get much easier than that!

I served it with a little sprig of fresh marjoram and a sprinkle of grated salted ricotta cheese... a few grinds of chili powder... and simply Buon Apetito!

Sunday 20 November 2011

Hares and Graces

Lepre alla Provenzale, Brasato al Sidro, con Pure alla Maggiorana & Verdure Miste
Cidre-Braised Hare "Provencale", with Marjoram Mashed Potatoes + Vegetables


I can't tell you good people often enough how much I love shopping at the market hall in Frankfurt- it is like "Around the World in 8 Minutes" in there! Yesterday, I was desperately trying to think of something seasonal to cook... but something a little out of the ordinary.
Not wanting to do chicken again, or pork, or beef, I began to think I needed to buy a nice cut of lamb. And then I saw rabbit. Hmm... decisions, decisions! Just as I was about to ask for a couple of filets from the rabbit- I saw the darker, richer, juicier and gamier cuts of hare... THAT was what I wanted! Something new to me but nice and old- fashioned and traditional at the same time... perfect!


So I set about preparing it in a pseudo-traditional way today, and marinating it beforehand, as is the norm with game, to get rid of the "gamey" flavor. Well I am sure that, that was true many moons ago when people were not able to refrigerate things the way we do nower days- so I didn't see a need to have it soaking overnight. I put it in at 10 am this morning and cooked it at 5 pm- and I think that was plenty of time. I soaked it in cider, to which I added rosemary, thyme, garlic, salt, pepper, bay leaf and a lovely, large red shallot.


7 hours later, I poured everything but the shallot into a saucepan, brought it to a boil and then turned it down to simmer for a couple of hours. I had to keep replacing cider as it cooked down of course. An hour later, I prepared the vegetable sides- this time I decided to do carrots and Brussels Sprouts- nothing crazy there- just plain, simple Autumn flavors. The mashed potatoes on the other hand, were flavored with fresh marjoram, nutmeg and butter... YUM! But again- hardly rocket science.


After an hour and a half, I removed the hare from the pan and poured the juices through a sieve. I turned up the heat in the frying pan, so that the stuff that had accumulated at the bottom of the pan began to get a little toasty- and then I deglazed the pan with a shot of Calvados. I then added 2-3 finely crumbled gingersnap cookies, the juices I had strained and as little tomato paste. I turned the heat up a little and let this render down. After 10 minutes or so, I returned the hare and the shallot to the pan so it would finish off cooking in that lovely rich sauce... mmm!


10 minutes later, this yummy, Fall dish was ready to be served- hearty, rich and ultimately comforting... what's not to love? I know that I did!


Puff, The Magic Pastry

Sfogliatelli di Biscotti di Zenzero, Yogurt & Mirtilli 
Puff-Pastry Triangles with Yogurt & Gingersnap Cream and Blueberries


I have already admitted to not knowing how to bake- so I am particularly proudly and shamelessly introducing my newest "Dummies Dessert"- basically, just because it works and is yummy and pretty to boot! As I used a low fat yogurt, it is even pretty healthy- all things considered! Sure we have a little puff pastry there- and yes, there are (yet again), another handful of gingersnaps in there- but there are plenty of much heavier desserts out there. And this is how I made them...

Again, very, very simple- just crumble some cookies and stir into them a couple of spoonfuls of yogurt. I used a low-fat vanilla yogurt- the vanilla flavor, though obviously not from a real vanilla pod, still tastes great in this combination. Stir the cookies and yogurt together very lightly- in this case we want to have the chunks. Then add the berries and  some cinnamon and turn your attention, to the difficult task of cutting your pre-made puff pastry into shape!


Spoon the cookie & berry topping onto the pastry, leaving a border all the way around, for the pastry to be able to puff up a little and to hold everything in place. Finish them off by  pushing the occasional berry into the mix here and there... these last berries are important!

Bake in a pre-heated oven at a high temperature, until the pastry puffs up and the berries start to pop and to ooze their lovely juice- mmm! That is why it is important to have some berries showing, that are not covered with the cookie mix.

As soon as the pastry is done, go make a big pot of coffee... because these little babies are ready to be enjoyed!

Punkin' Pancakes

Frittelle Piccolini di Colazione di Biscotti di Zenzero, Zucca e Menta
Mini Gingersnap, Pumpkin and Mint Breakfast-Pancakes 

I know- all of my sweet dishes are just improvised "not really cooking or baking in the real sense of the word" creations. But don't be too hard on me- because like it or not- they taste pretty good! They are easy to make, will please you and your guests... and how much more do you want? I would say that's not a bad deal all things considered!

So this morning I decided I was going to make pancakes. I have still got 3/4 of a Hokkaido pumpkin in the fridge. I still have that packet of ginger-snaps that I bought. Actually, the cookies that I have are German spiced cookies called "Spekulatius", which you only get at Christmas time- I love them! They remind me of the "ginger biscuits" we used to have in England when I was growing up... and nostalgia is a GREAT ingredient in any dish as we all know!


Anyway, let me tell you how I made them! I crumbled up the cookies and poured milk over them. I let them sit for 3-4 minutes, until they were soft and then whisked them until I had a smooth and creamy paste. I then cut off a chunk of pumpkin and grated it finely. I would say I had a cupful of pumpkin, a cupful of "cookie-cream"- and to this mix I added 1 egg. I jazzed up the mixture with a little cinnamon, a pinch of salt, a dusting of grated nutmeg and maybe 1 teaspoon of very finely chopped mint. I then added a tablespoon of baking powder and went about heating up my frying pan- you see, at this point, I had licked the spoon I had been using to stir the mix together and knew that good things lay ahead...


I noticed after making the first trial pancake, that this mix does remain very soft in the pan- and quickly realized I would be better off making smaller sized pancakes. So in a very lightly greased pan (I used clarified butter- which is my favorite as it doesn't brown or burn and can be heated much higher than regular butter), I made little pancakes, which were just one tablespoonful of batter at a time. Yes, they ARE delicate to flip in the pan- the best way, is to lift one edge with a spatula, lift it, and use your hand to hold it up a little so you can get the spatula further below the pancake- then over it goes! It may take a bit of practice- but you want fluffy pancakes, right?  Then the batter is going to be soft! I suppose in retrospect, you COULD finish them under the broiler- but I wasn't smart enough to think of that this morning- I think I will do next time though! Now there's a bit of honesty and a good tip for ya!


I served mine up with a dusting of powdered sugar- which was just for appearances sakes and with a drizzle of honey- which was for the sake of some extra yumminess! I chose not to use maple syrup- I wanted a slightly different taste to regular pancakes- obviously! And the mint and pumpkin and gingersnap flavor, along with the added spice, did the trick just nicely! Sadly, mine were just lukewarm by the time I had taken these photo's for you... but I DID sneak one before I got started- and I recommend you get your serving while it's hot!


Saturday 19 November 2011

Salad Days in Autumn

Carpaccio di Manzo con Zucca "Hokkaido", Feta, Mirtilli + Portulaca
Beef Carpaccio with Hokkaido Pumpkin, Feta, Blueberries + Purslane


I have to admit that given the choice, I will almost always choose a soup over a salad, especially in the colder seasons. But today, I stumbled upon a stall selling purslane lettuce at the market hall. I had heard of it before, but never actually made it myself. I pinched off a leaf and tried it- it was very mildly peppery, but had a nice "bite" to it and was juicy- in fact, the leaves remind you a little of a succulent- except for the very long stalks! In any case- I kicked the idea of a soup out of the window for this evening- I had to try out a salad made of purslane- it was as simple as that!

The next thing that caught my eye was a small Hokkaido pumpkin- my favorite variety- although this was unusual in that it was green on the outside, rather than red/orange. I love hokkaido's- not only because of their great flavor- but also because you can eat the skin and don't need to peel them! 


Next thing I knew, I was walking past the meat counter and seeing all that juicy, raw meat made me think of a great carpaccio... so of course that was the next thing to go into my shopping basket!

And obviously, you will have noticed that the blueberries somehow made it home from the market with me too... and mint... and pine nuts! It just all came together- a sudden flash of inspiration... and I am so glad that it did- as the result was pretty delicious!

I started off with the pumpkin... obviously, as it is the only thing that needed to be cooked! I fried it in very little clarified butter at quite a high heat- it doesn't need much cooking and is soon lovely and golden brown. I first spread a little mustard on my plate and drizzled it with honey. Then came the purslane, or "portolaca" as it is also known,which has rather long stems- but they are very tender and too delicious to be cut away or snapped off. So I arranged it so that the leaves were on the outside of the plate and the stems were pointing inwards. Which of course made it easier for me to lay out the beef carpaccio on top.


Next came a fine dice of Feta cheese and a few leaves of mint, a little freshly milled pepper and a hint of salt. Then came the pumpkin slices and the blueberries. The dressing was the juice of half a lemon, a drizzle of olive oil and a sprinkle of my "Salt of the Earth"- but sure- regular salt will do!

The combination of the beef, which gets dragged through the honey and mustard underneath it as you pick it up, combined with the salty feta and the sweet berries, the mild and nutty pumpkin and the fresh and delicious purslane is... well- just pretty damned good! And I sure hope you enjoy it too!